Smart phones have become an essential part of daily living. These devices are not just our phones, but also our daily planners, health monitors, phone book, music collections, photo albums and much more. That is why having a back up of your phone’s data is important in case your device is ever lost, damaged, or replaced.
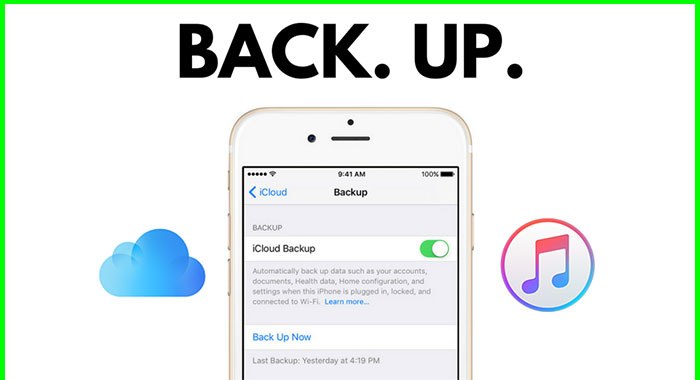
Backing up your iPhone takes all your data from your phone and creates a copy of it. Luckily Apple has provided two simple methods to back up your iPhone: iCloud and iTunes.
iCloud is by far the simplest way to backup your device but it has it’s draw backs. Though you can conveniently back up your device on iCloud wirelessly, Apple only allows you 5Gb of free storage. To store more data on iCloud, you will need to purchase extra space from Apple.
With iTunes, the iPhone’s backup is created on your Mac or PC, by connecting your device to the computer. This allows you to back up as much data as you’d like, as long as your computer has the free space.
This tutorial will show you how to back up your iPhone using either iCloud or iTunes.
Connect your device to a Wi-Fi Network
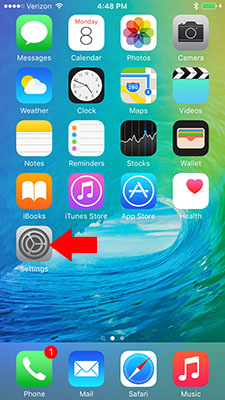
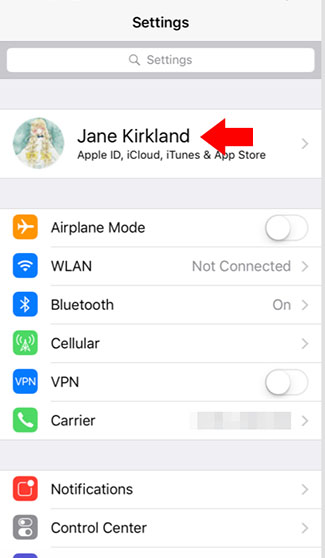
Open the Settings app
Select Apple ID at the top of the menu. The tab should be labeled by your name
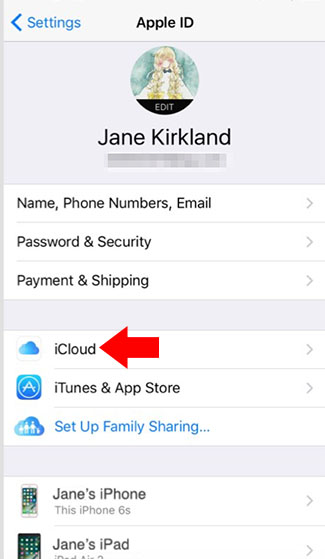
Tap iCloud to open the iCloud menu
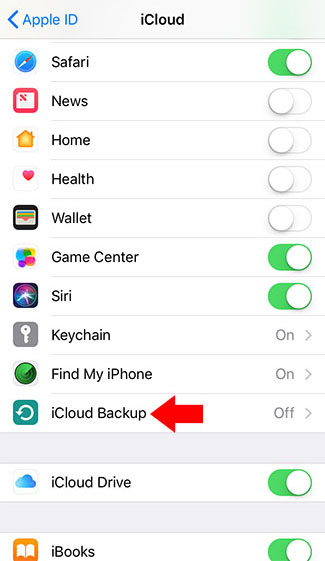
Select iCloud Backup
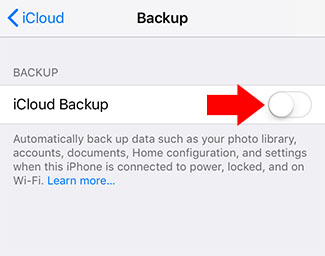
Tap iCloud Backup Toggle to turn it on.
Press OK to confirm backup
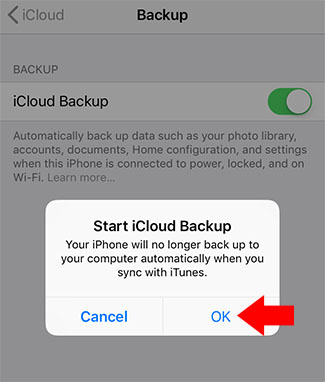
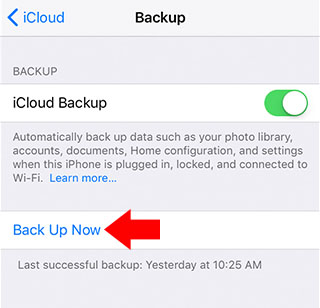
Note: The prompt will not appear if iCloud Backup was already turned on for the device. Instead you will see a tab labeled “Back Up Now“. To back up the device again press “Back Up Now”.
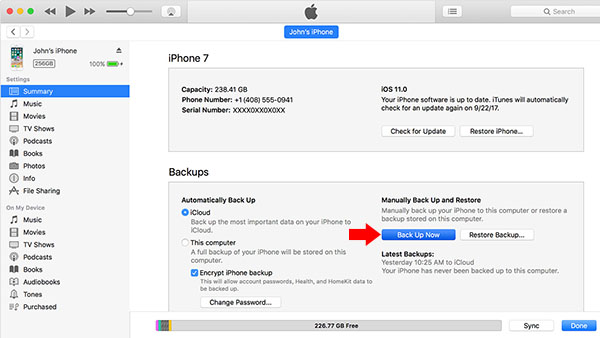
Open iTunes on your computer and connect your device
Select the device when it appears on the iTuens menu.
Select Back Up Now to begin process. iTunes will inform you when backup is complete.
Found this useful? Share to help others and follow us on Facebook.
Latest Articles
You have been added to our list


